My Daughters Bedroom Remodel
My little Allie’s growing up, I swear we were just bringing her home from the hospital (where does the time go?). She turned 7 in March and we wanted to give her a big girls room for her birthday. Something a little more grown up, but still captures her youth. Does that even make sense?
We found THESE gorgeous wall decals from Urban Walls and instantly fell in love. We made these Peonies the main focus of the room and designed everything else around them.
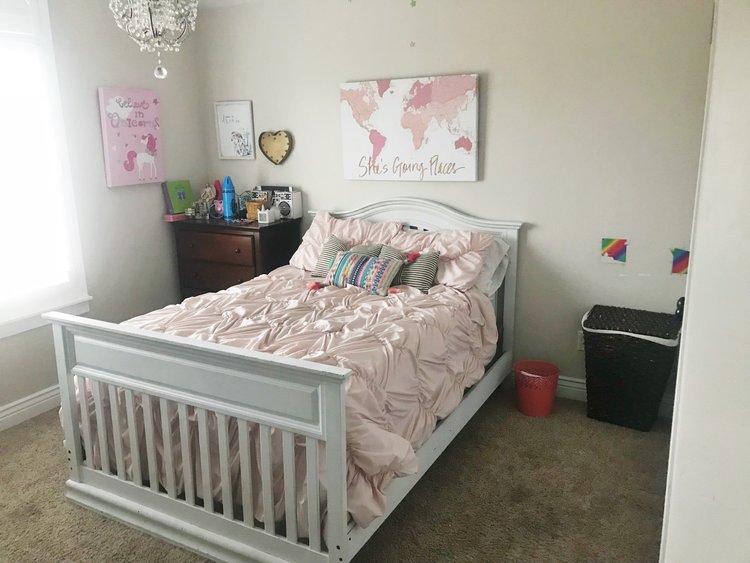
I put together this post to show you the before and after of my daughters bedroom remodel.

Originally Allie’s room was painted a cream color on all four walls. A color I couldn’t wait to paint over. We decided to go with the color 7004 Snowbound from Sherwin Williams. Guys, this color is SO good and really brightened up her room!


Next we wanted to get rid of of that ugly brown dresser. We took the drawers out, sanded everything down and painted it the most beautiful green color. We went with 6193 Privilege Green.
I knew we hit the jackpot as soon as we painted the first drawer.
We wanted the pulls to pop so we spray painted them gold. It really brought the dresser to life.


We knew we wanted an accent wall for the Peony decals to go against. I thought a super dark grey would look really against the Peonies and green leaves. We went with 7069 Iron Ore… it was perfect!


Next, the hubby built some floating shelves to use as book shelves. We spray painted them the same gold color as the pulls on the dresser. It was super easy and quick.


Originally we didn’t plan on getting her a new bed. But it ended up breaking right in the middle of our remodel so I searched the web for a gold bed I secretly was dreaming about since we painted to the pulls and bookshelves gold.
We found THIS bed for a good price and ordered it that day. We went with a full size bed because that’s what she had before. That way we didn’t have to buy a new mattress.
I got the package and put it together myself in a little over an hour. Super easy.

Last, we put the Crimson Peonies decals up. Just a quick little note… you have to wait for your freshly painted wall to dry (about 5 weeks) before sticking on the decals. This can be a bummer when you’re excited to get your project finished, but I promise it’s worth the wait. The last thing you want is for your decals to start peeling off just a few weeks after installing them.
They were super easy to install. We just cut them out peeled off the back, stuck them on the wall where we wanted them, rubbed them on the wall really good to get a good stick and pulled off the top sheet of paper. It took me about 1.5 hours to install the entire wall.

We couldn’t have been happier with how everything turned out. Allie LOVED it and couldn’t wait to show it off to all her neighbor friends. Every time one of her friends walks in the room the first thing they say is…. oh my gosh those huge flowers are so pretty, I want those.
It’s so cute!
Now that her and her brothers room is done.. maybe someday I’ll finally make it into MY room lol.
-Linds

